LINUX TUTORIAL
9 Essential Linux Commands to Find Files Quickly
🔺 Speed Scroll 🔺

Finding files on Linux can feel tricky for beginners. The directory system is different from Windows, and it’s easy to get lost. But I have some good news: Linux has powerful commands that make it simple. In this post, I’ll share 9 essential commands to help you find files faster.
Commands such as find, locate, and grep come pre-installed in most distributions and can be used to find files on Linux. Tools such as Midnight Commander, ripgrep-all, and fzf can also be installed from the official repository.
I’m excited to share them with you. Each one is perfect for specific situations when you want to search for files on your machine using the command line. Let’s get started!
Table of Contents
- find – Search for Files
- locate – Searched Using Indexed Database
- grep – Search for Patterns Within Files
- whereis – Locate Binary Source of a Command
- tree – Display Directories and File Tree
- du – Find Files Based on Size
- Midnight Commander – Navigate Manually to Find Files
- ripgrep-all – Search for Patterns Within PDF and Word Documents
- rga-fzf – Context-Based Fuzzy Search
If you need help with Linux, I’ve got something that can help you right away!
Download my free Linux commands cheat sheet – it’s a quick reference guide with all the essential commands you’ll need to get things done on your system. Click here to get it for free!
find – Search for Files
When searching files on your Linux machine, the most basic command line tool is the find command. Using this command, you can search your file system for files based on your search criteria, and it will show you a list of all files that match the defined criteria.
Installation
Find comes preinstalled in most Linux distributions, and you can check it using the command:
find --versionHowever, if find is not installed in your distribution, you can install it from the official repository using the command:
sudo [apt/yum] install findutilsUsage
Find usage is straightforward. The general syntax for find is as follows:
find /path/to/search -options criteriaFor example, to find a file named “sample1.txt” in your home directory, you can use the command as follows:
find ~ -name sample1.txtIf you want to find all txt files in a specific directory, you can use the command like this:
find /home/pat/Documents/Samples -name *.txtAs you can see, the usage of find is straightforward and intuitive. Find has several search options and criteria. Besides searching for file names, you can also search using file size, file type, file modification time, etc.
locate – Searched Using Indexed Database
Another helpful command for searching files on Linux OS is the locate command. Unlike find, locate does not do a real-time search of all files on your system. Instead, it only looks through a prebuilt database and shows the results matching the search criteria. Consequently, locate can be much faster in execution than find.
Installation
You can install locate using the plocate package from the official repository using the command:
sudo [apt/yum] install plocateUsage
locate only searches for files that have been indexed in your database. By default, locate automatically maintains an indexed database of all your files once a day. However, you can use this command to update the database manually:
sudo updatdbOnce your database is updated, you can search for a file with a specific name using the command:
locate sample1.txtTo search for all HTML files on your system, you can use the command (using the -n flag to limit the number of results):
locate "*.html" -n 20Another cool thing this command can do is count the number of files matching your search criteria. For example, if you want to find out how many HTML files are in your file system, you can use the command as follows:
locate -c "*.html"As you can see, locate is very similar to find in terms of usage. find is relatively more versatile in its search criteria. However, locate has the advantage of being faster in execution owing to its indexed database.
You can find more details on the locate command on the official Linux manual pages as well.
Tip: Command lines can be a pain to memorize. I put the essential Linux commands on a printable cheat sheet so you don’t have to keep googling them. You can grab the PDF here if you want to save some time.
grep – Search for Patterns Within Files
The Global Regular Expression Print or grep is a command in Linux that can be used to look for patterns in any text file. It can search for files based on their content instead of using file names.
Installation
grep is one of the most basic commands in Linux. It comes packed with all distributions, and does not need to be installed separately. However, if you are working with a Linux distribution that isn’t pre-packaged with grep, you can install it using the official repository:
sudo [apt/yum] install grepBonus tip: At some point, you’ll get tired of copying commands without really understanding them. I put together a cheat sheet with 74 essential commands and simple examples. Grab the file here (free).
Usage
To search for all files in your home directory that contain the text “Lorem,” you can use the grep command as follows:
grep -r "Lorem" ~You can also use the -n flag to find the exact line number on which the keyword appears in each file:
grep -rn "Lorem" /home/pat/Documents/Samples/TextYou can combine the grep command with the find command to incorporate multiple search criteria. For example, to search for your home directory for all text files greater than 1kB that contain the keyword “Lorem,” you can combine the two commands as shown below:
find ~ -size +1k -name *.txt -exec grep -l "Lorem" {} \;As you can see, the grep command is exceptionally versatile. Searching for files based on patterns is just one use-case scenario. To learn more about this Swiss knife, read this in-depth tutorial on “How To Use ‘grep’: The Complete Linux Command Guide”.
whereis – Locate Binary Source of a Command
Another useful command in Linux OS that comes pre-installed with most distributions is the whereis command. This command allows you to search pre-defined locations for a specific command line tool’s binaries, manuals, or source code.
Installation
The whereis command is included in the util-linux package and comes pre-installed with most Linux distributions. However, if you want to install it manually, you can use the official repository:
sudo [apt/yum] install util-linuxUsage
The usage of whereis command is very straightforward. You can use the following syntax to search for a specific command’s associated binaries, manuals, and source files:
whereis <command>You can also use different flags with this command to filter results based on your requirements. For example, you can use the -b flag to list only the location of binary files associated with that command:
whereis -b <command>Another similar command is the which command, which helps you find the location of an executable associated with a specific command:
which -a <command>tree – Display Directories and File Tree
tree is a command line tool that lists all files and folders in a hierarchical format of directories and subdirectories. It can be used with a search filter to search for specific files and display the information in an easier-to-understand format.
Installation
You can install this tool from the official repositories using the command:
sudo [apt/yum] install treeUsage
the tree can be used without any arguments to list down all files in a tree-like hierarchal format, showing the folder and subfolders and the exact location of each file.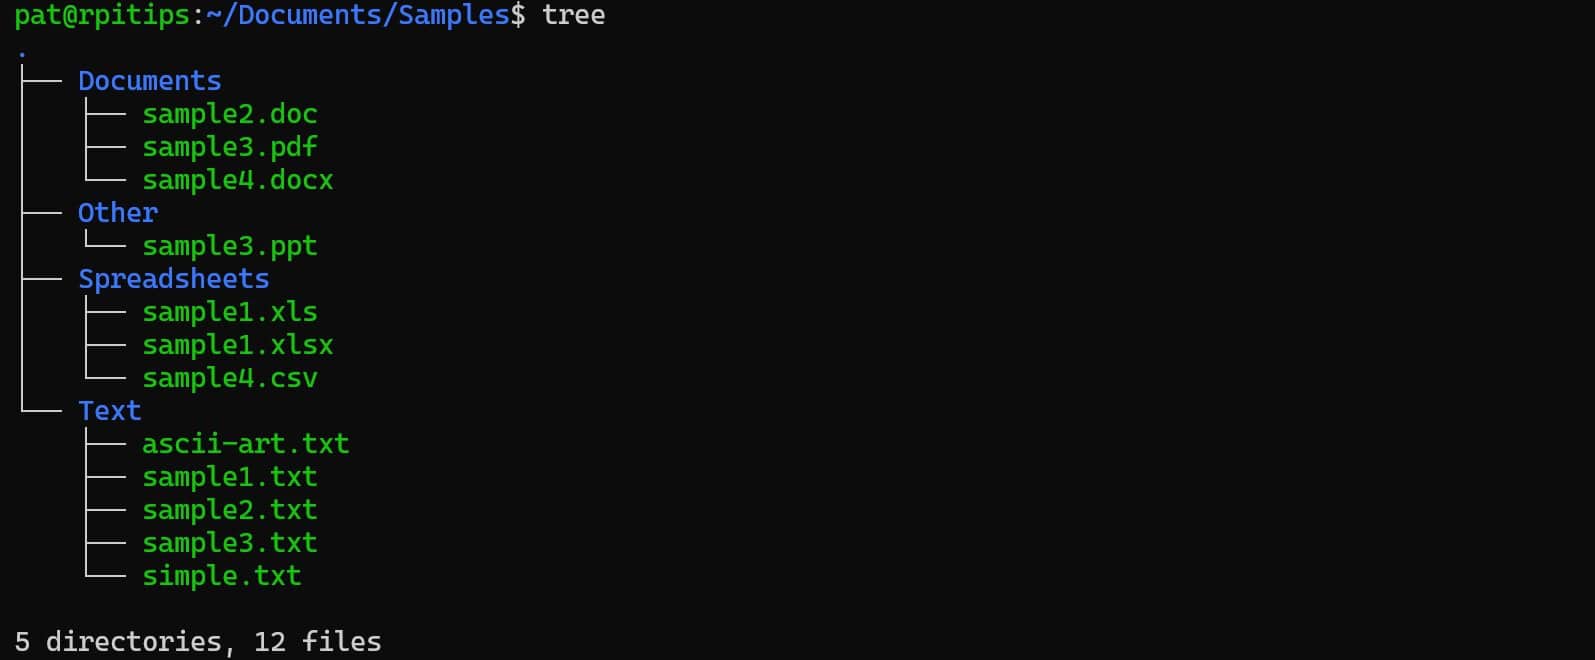
Alternatively, you can search for a specific pattern using the -P command line option:
tree -P *.txtSeveral other command line options to use with this command can help you filter out and search for a specific file using specific criteria. You can read the official Linux manual pages to see the complete list of all command line options.
du – Find Files Based on Size
You can use the du command line tool to find files that consume the most space on your Linux system and fill up your disk space. While it is not a search tool, it can help you carry out system hard disk administration.
Installation
du is included in the coreutils package and comes pre-installed with all Linux distributions. However, you can use the official repository to install this manually:
sudo [apt/yum] install coreutilsUsage
To carry out disk usage analysis of a specific directory and its subdirectories, you can use the command:
du <directory>You can use flags with this command to refine your search. For example, you can use the -a flag to display all files, including hidden files. You can additionally use the -h flag to display the size in a human-readable format:
du -a -h <directory>You can consult the official Linux manual pages to check out all available command line options.
Midnight Commander – Navigate Manually to Find Files
If you are adept with Windows File Explorer and its search-related options, you might be looking for a command line file explorer in Linux to look for similar options. Midnight Commander (MC) can navigate the Linux file system and search for files manually.
Installation
You can install the Midnight Commander (MC) from the official repository using the command:
sudo [apt/yum] install mcUsage
You can run the Midnight Commander using the command:mcand pressing Enter. You will be greeted with a dual-pane file explorer, which can be used to navigate and explore the file system. You can use both keyboard and mouse inputs.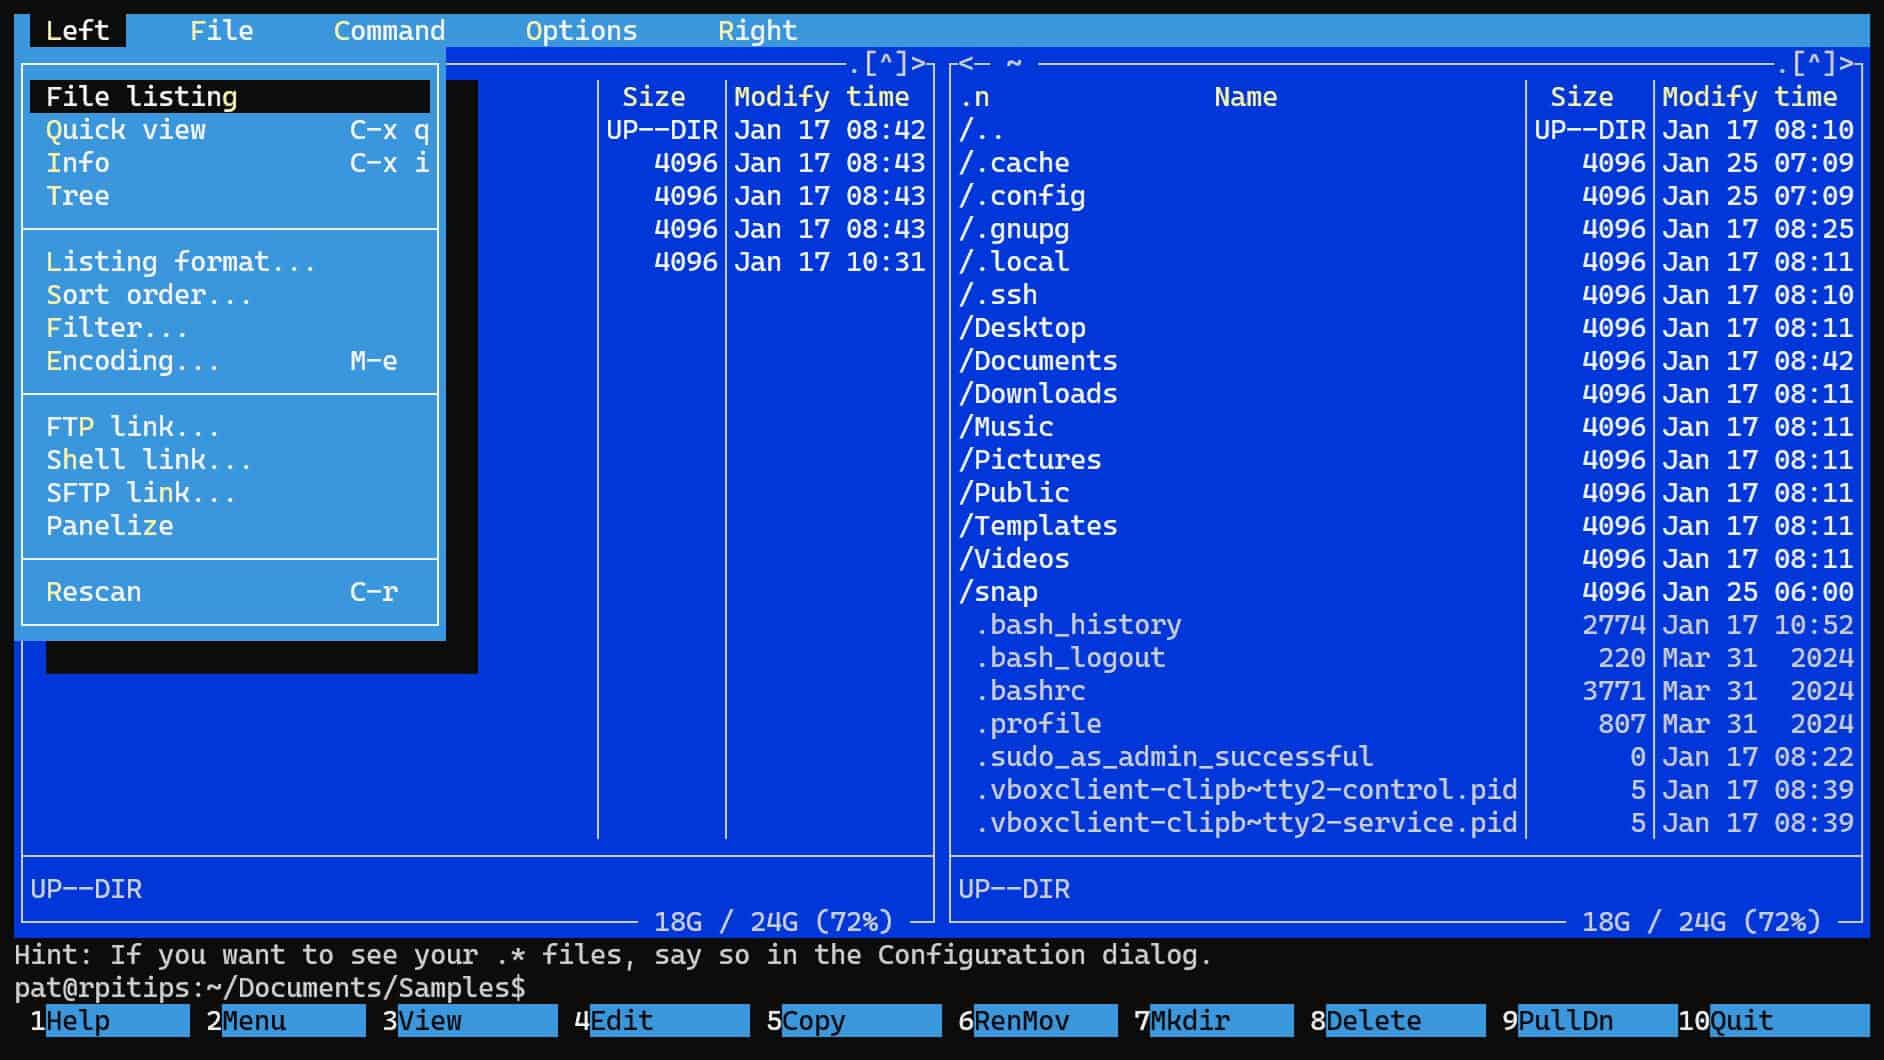
You can search for files by navigating to Command ->Find file. Alternatively, you can use the keyboard shortcut Alt+Shift+?.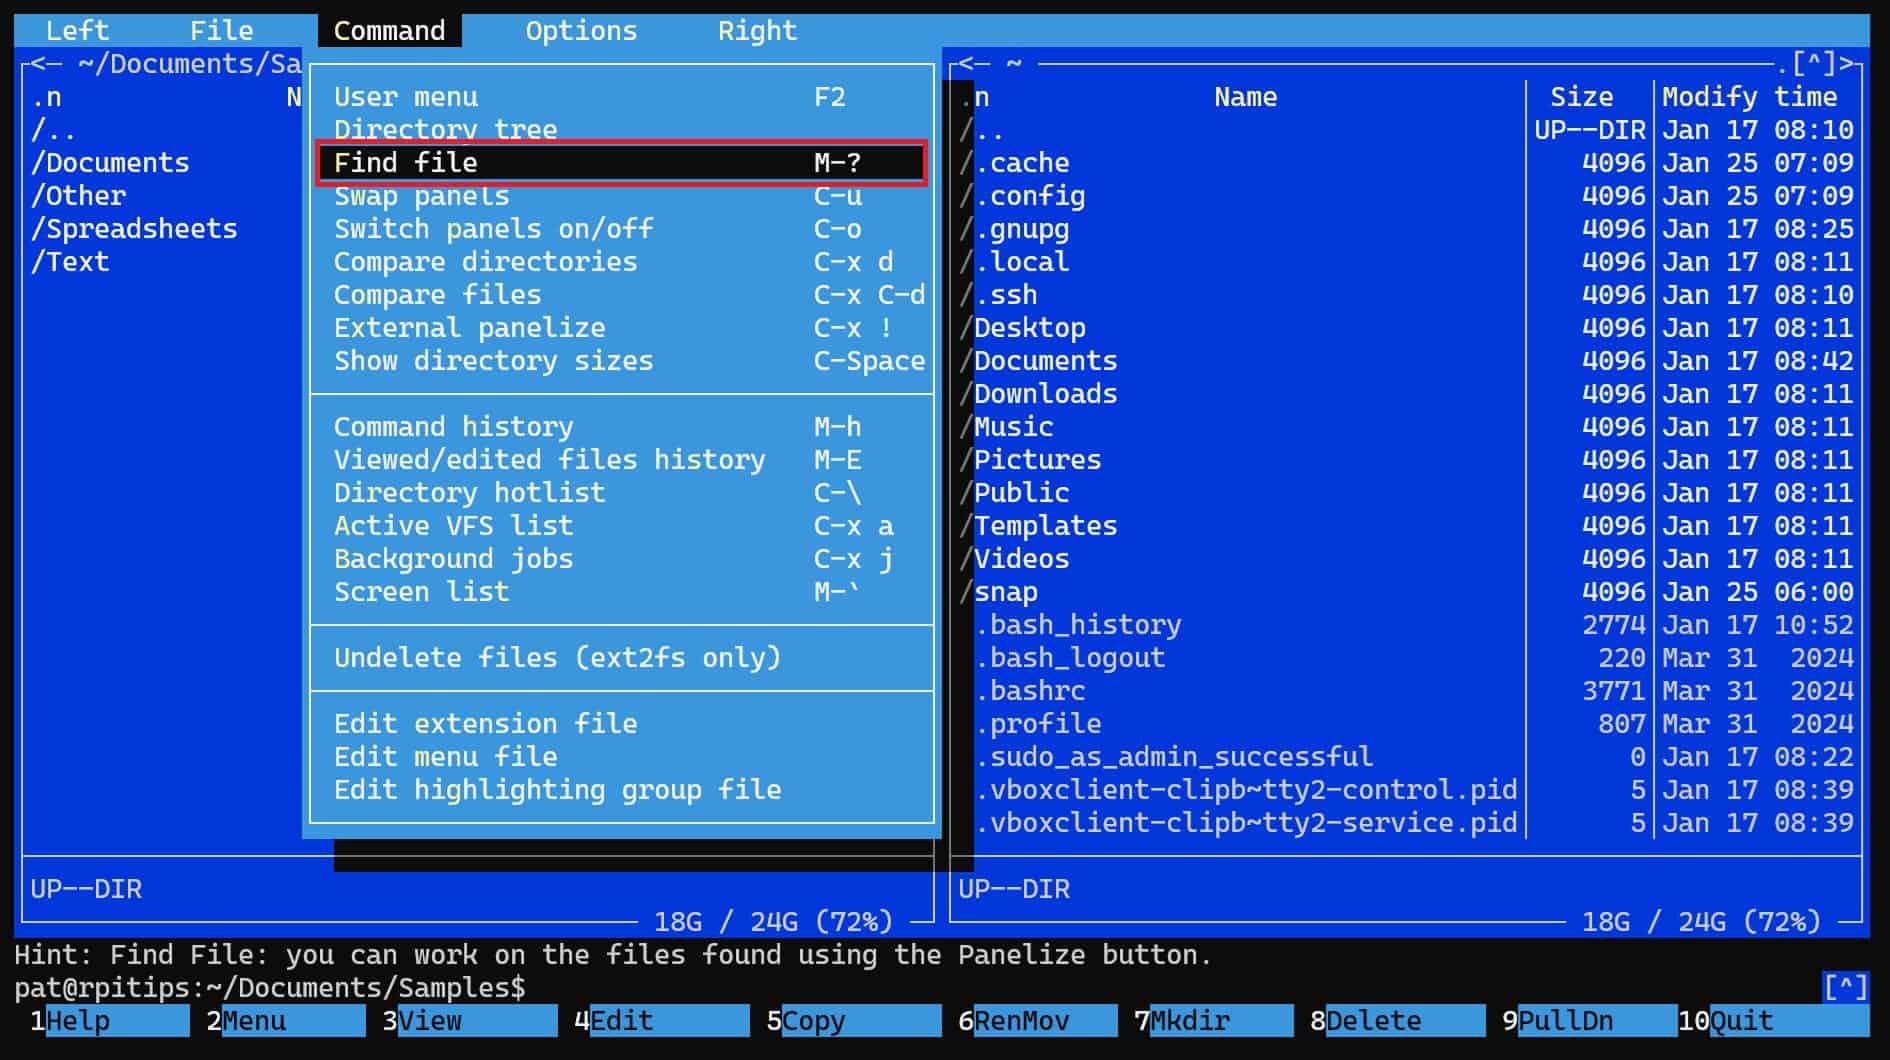
You can use the available options to search for files. The search options are similar to those in any graphical file explorer.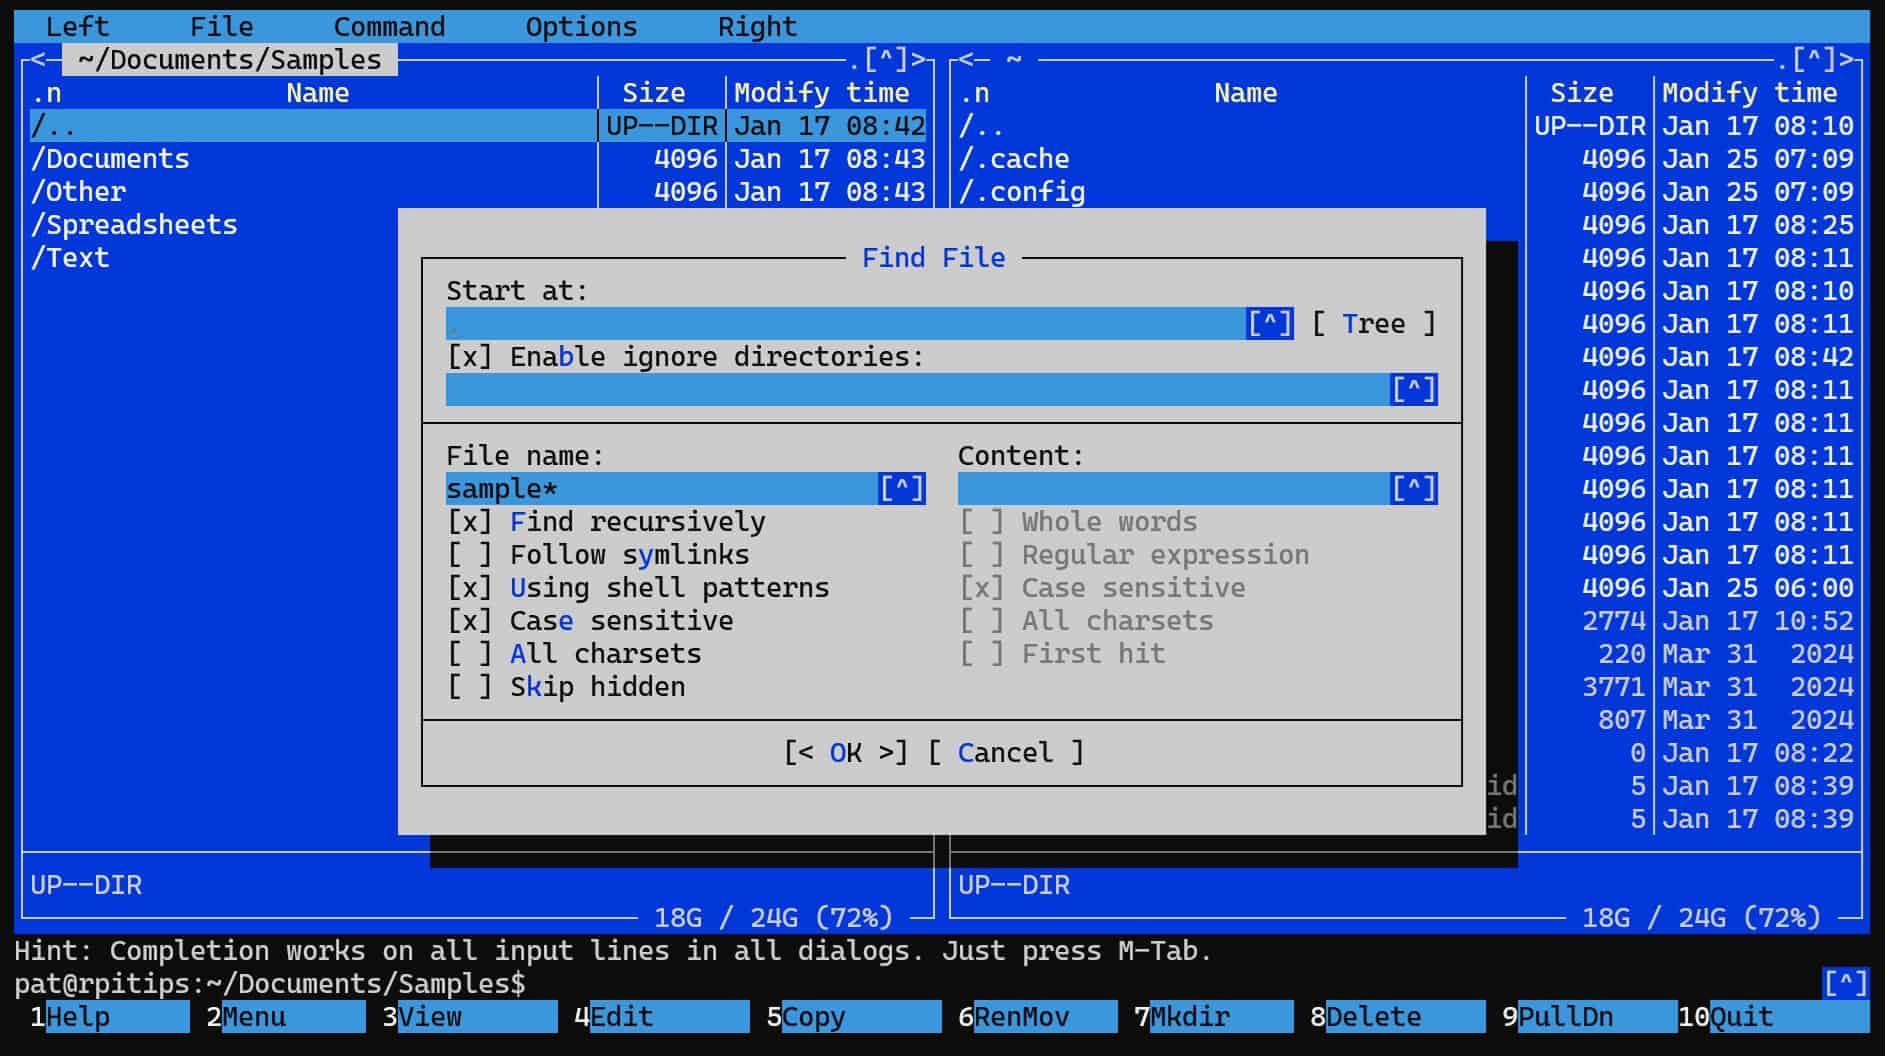
Upon selecting OK, you will be shown a list of all files that meet your criteria.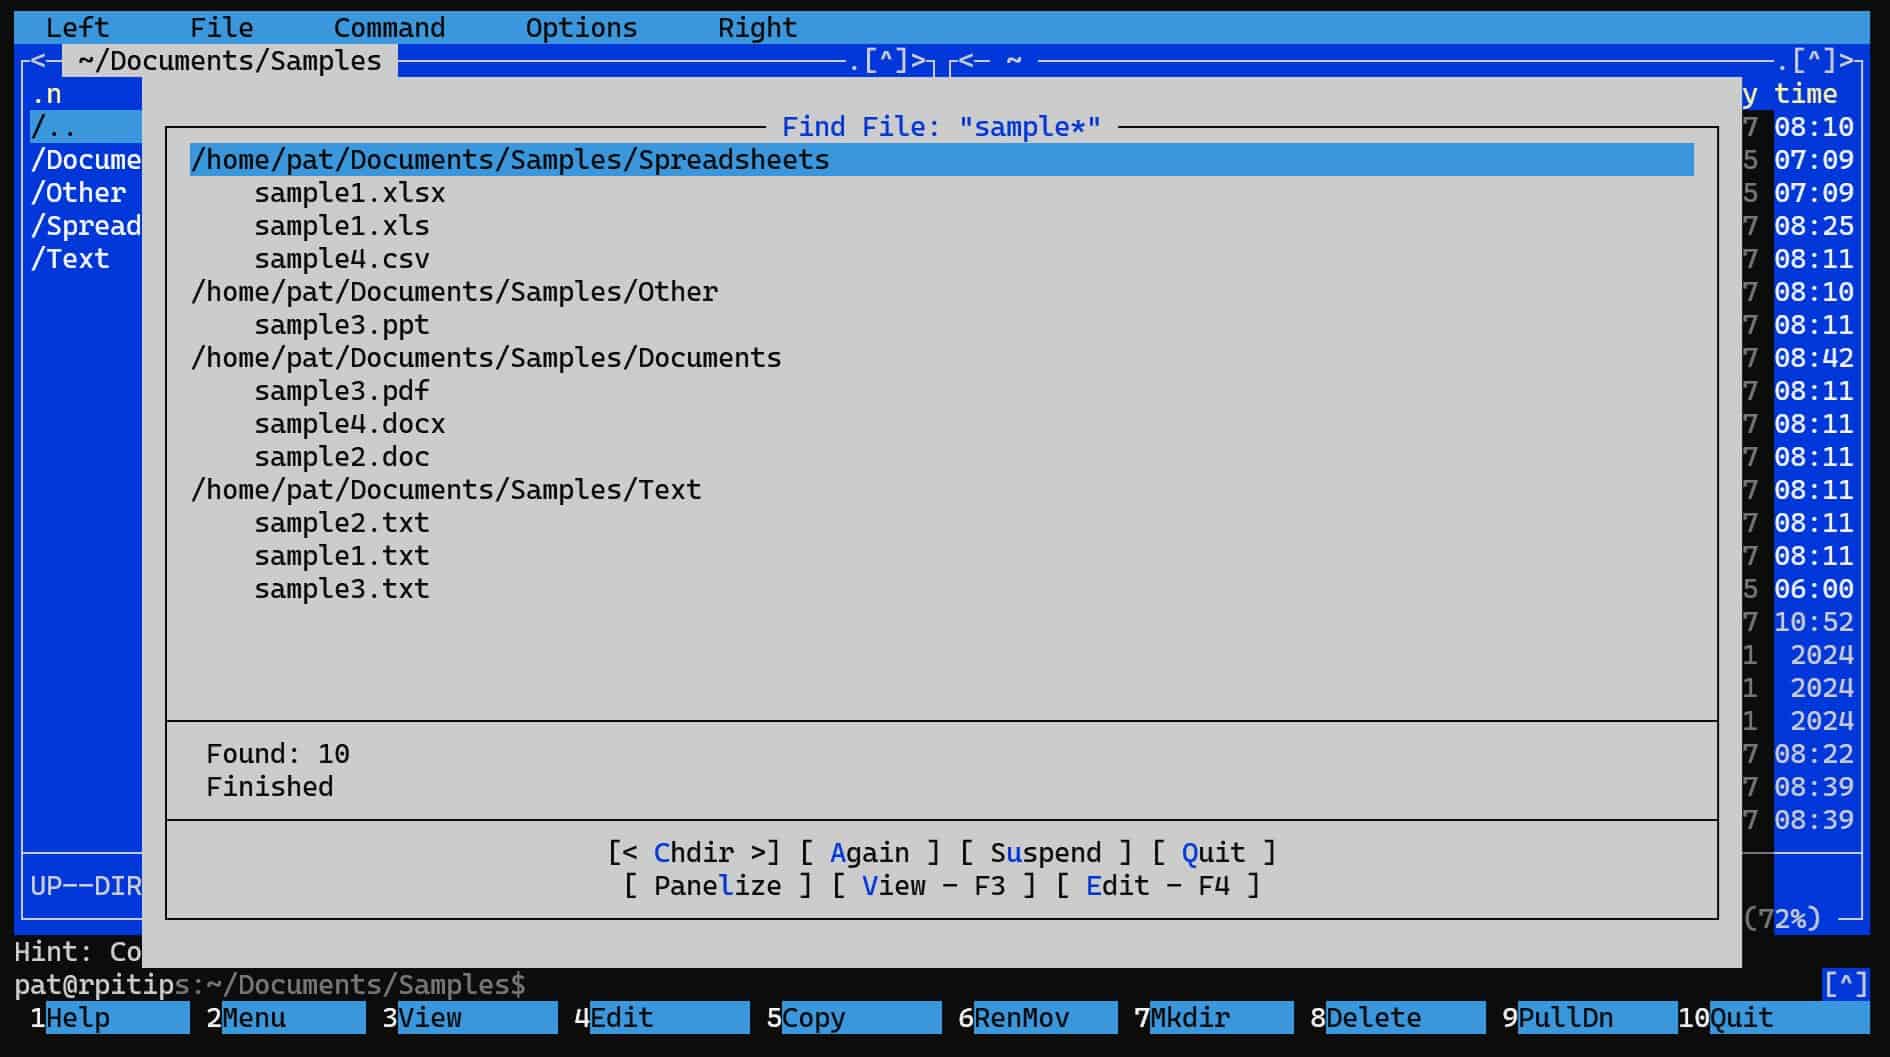
If you are familiar with typical file explorer search options, Midnight Commander can be an excellent command line tool for searching for required files. You can read more about its usage options on their official website.
ripgrep-all – Search for Patterns Within PDF and Word Documents
Bonus tip: At some point, you’ll get tired of copying commands without really understanding them. I put together a cheat sheet with 74 essential commands and simple examples. Grab the file here (free).
Another helpful alternative to grep for searching for files based on their content is the open-source tool rip-grep. rip-grep is an open-source command line tool developed as an alternative to grep and is relatively faster in processing/ execution.
ripgrep-all is another open-source command line tool. It is a wrapper for the rip-grep tool that allows looking into files other than plain text. For example, you can use ripgrep-all to search based on the content of PDFs, E-Books, Office Documents, etc.
Installation
ArchLinux users can install ripgrep-all through the official repository using pacman:
sudo pacman -S ripgrep-allHowever, ripgrep-all is not available through the official repository of Debian-based distributions like Ubuntu.
To install ripgrep-all on Ubuntu, follow these steps:
Make sure your system is up-to-date using the command:
sudo apt update && sudo apt upgrade -y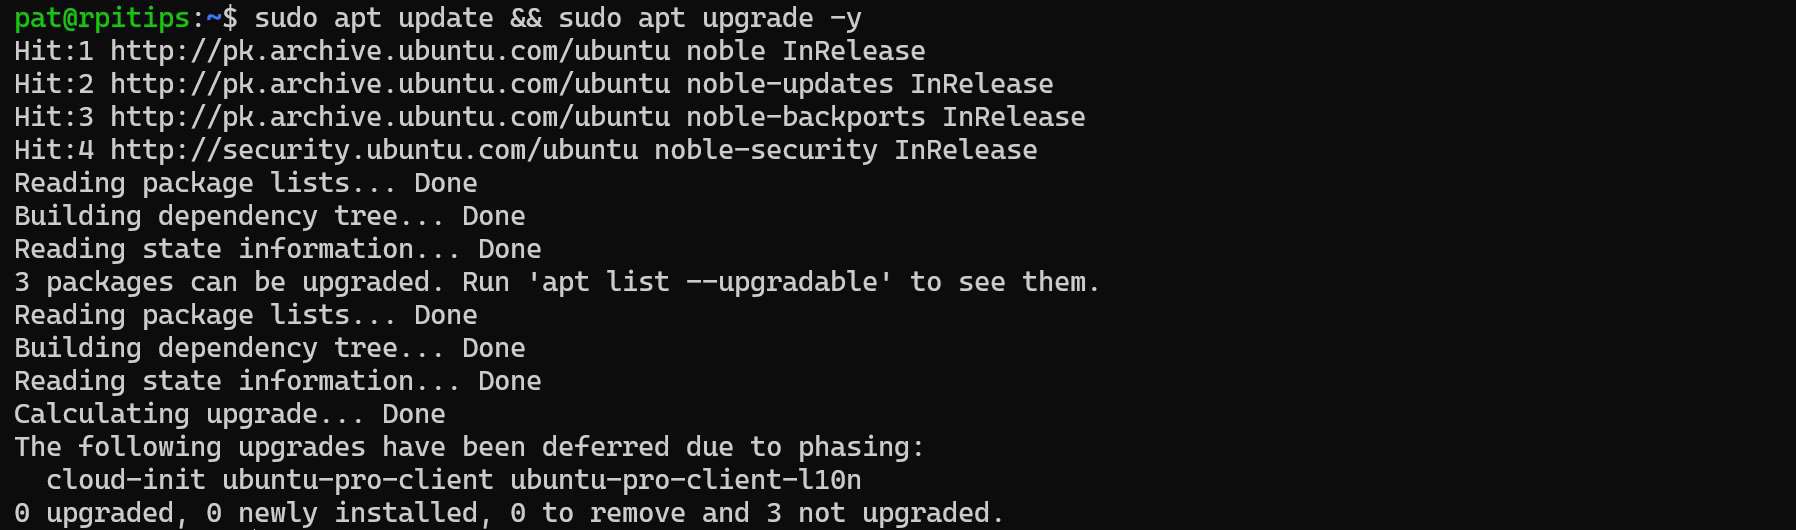
Install requisite dependencies using the command:
sudo apt install ripgrep pandoc poppler-utils ffmpeg
Download the latest version of ripgrep-all from their GitHub page or use the wget command below:
wget https://github.com/phiresky/ripgrep-all/releases/download/v0.10.6/ripgrep_all-v0.10.6-x86_64-unknown-linux-musl.tar.gz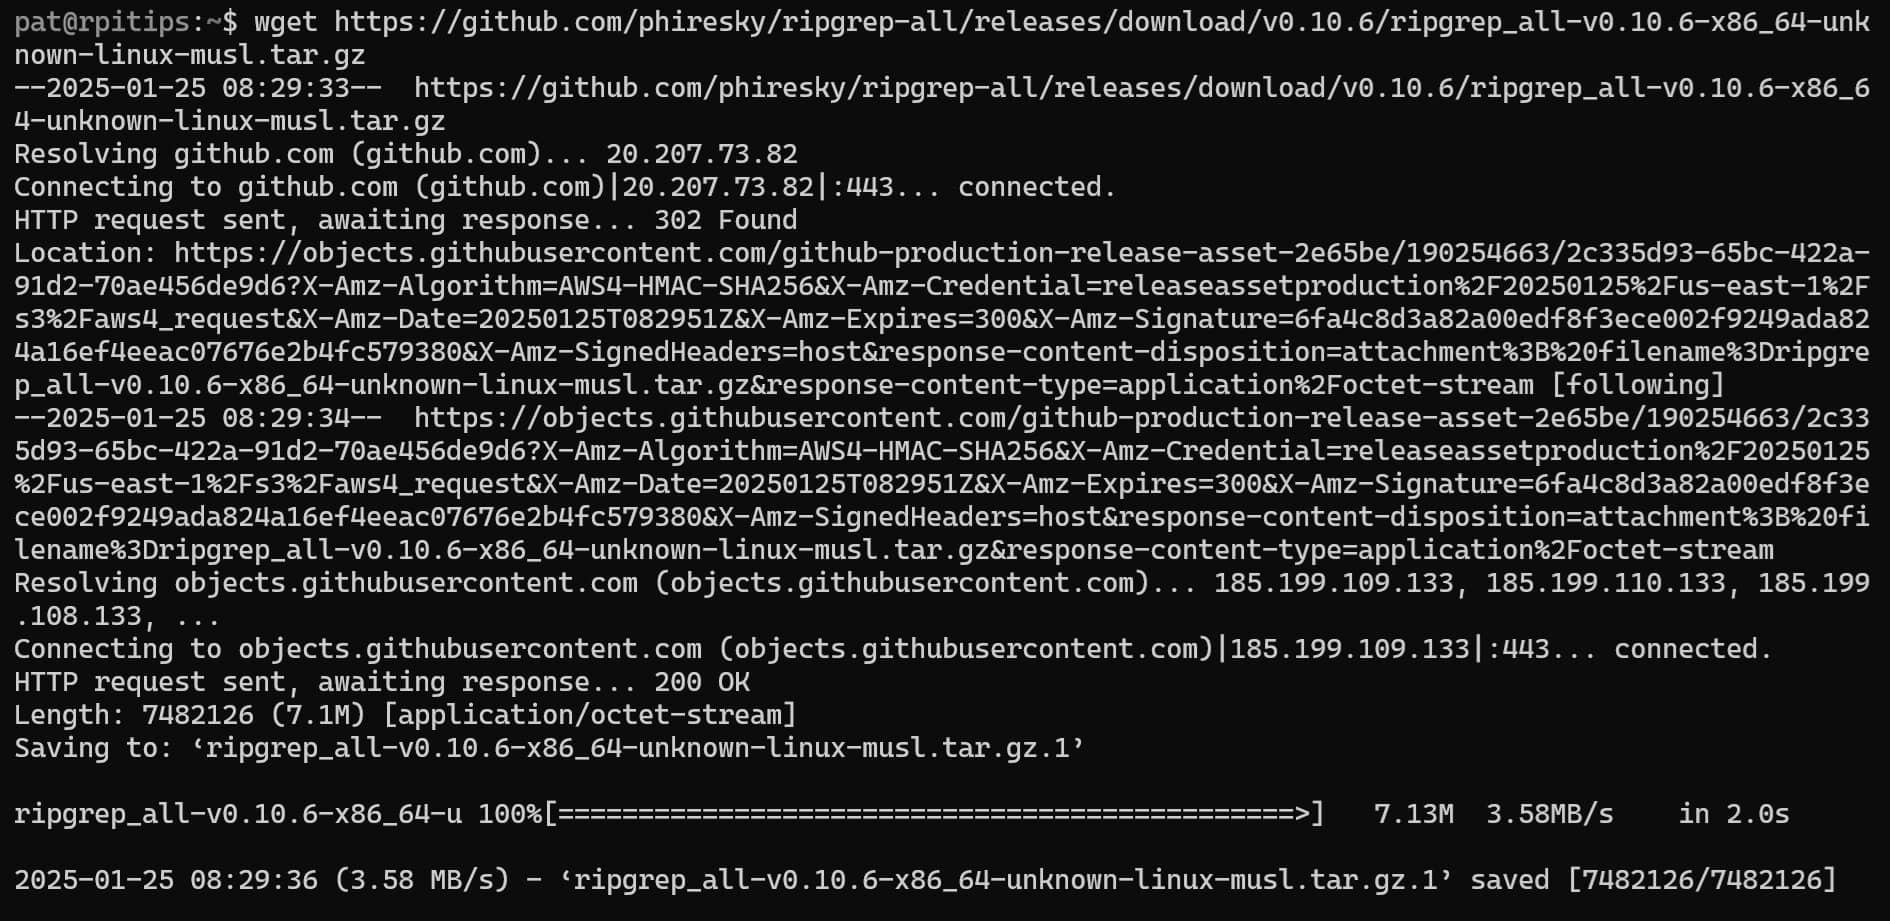
Extract the file using the command
tar -xzf ripgrep_all-v0.10.6-x86_64-unknown-linux-musl.tar.gzNow copy the requisite binaries to your PATH folder using the command:
sudo cp ripgrep_all-v0.9.6-x86_64-unknown-linux-musl/rga* /usr/local/bin/And that is it; now you can use the ripgrep-all using the command.
rgaUsage
ripgrep-all can look inside several file formats and help you make a contextual search. The file formats supported by ripgrep-all include:
- Media – mkv, mp4, avi
- Documents – epub, odt, docx, fb2, ipynb, pdf
- Compressed Archives – zip, tar, tgz, tbz, tbz2, gz, bz2, xz, zst
- Databases – db, db3, sqlite, sqlite3
- Images (OCR) – jpg, png
The general syntax for ripgrep-all is:
rga <Options> <Pattern> <Path>For example, you can use the command below to search for all files in your home directory containing the text “Heading” in them:
rga Heading ~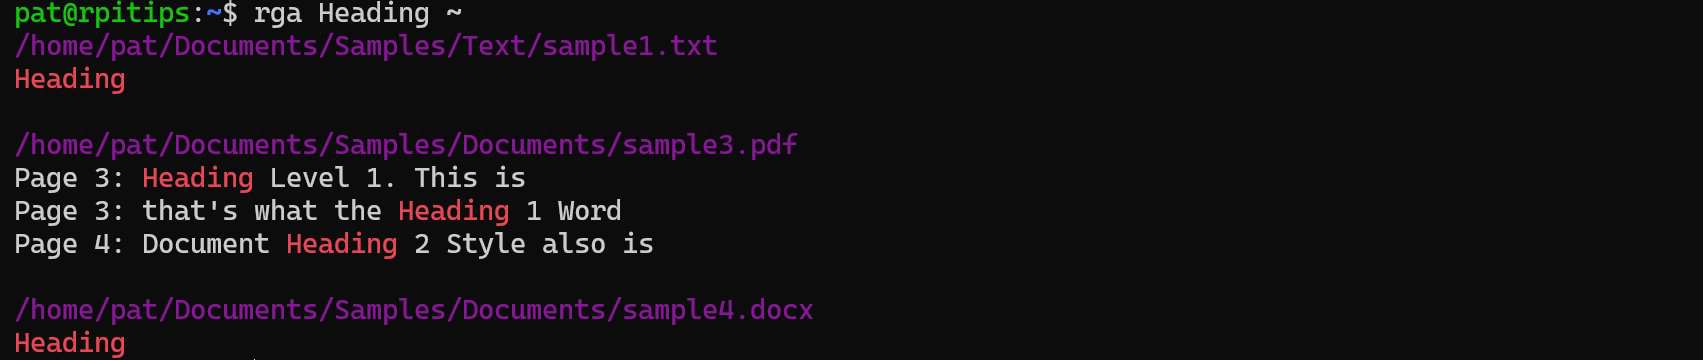
Additionally, you can use the command line option -C to see lines before and after the matched line to see a bit of the context:
rga -C 2 'Heading' ~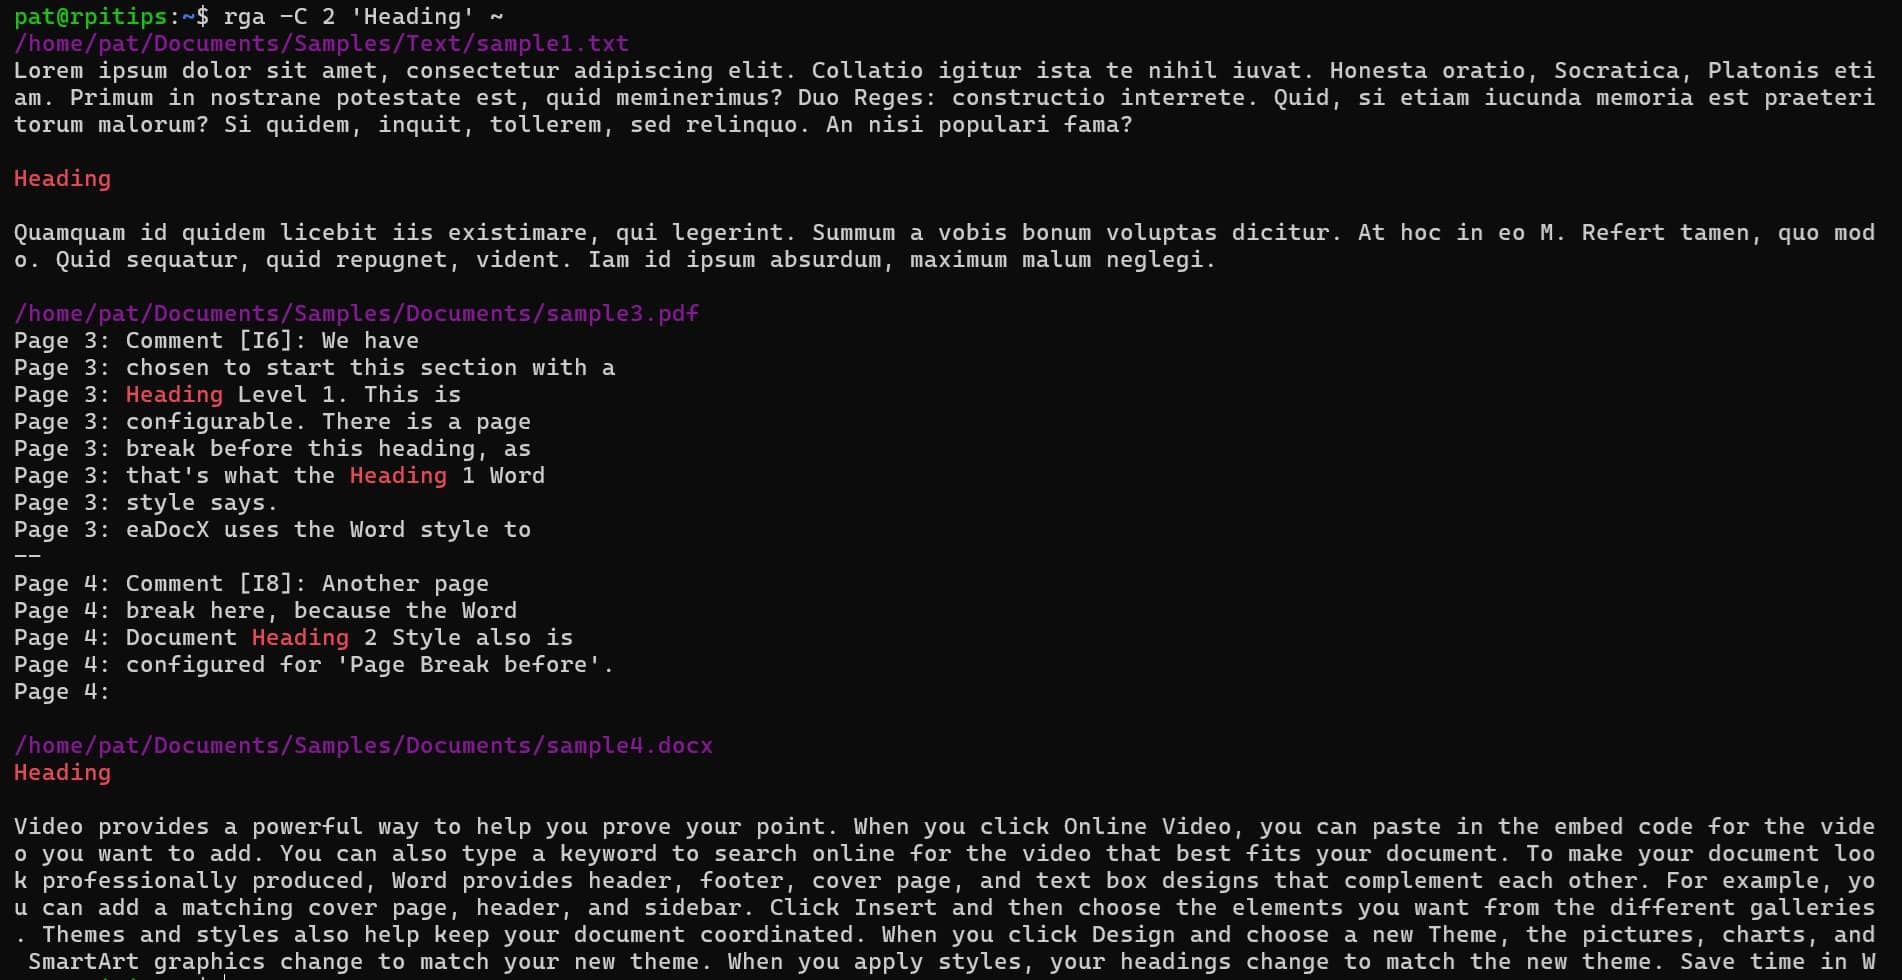
As you can see, while being reasonably similar to grep, ripgrep-all has the advantage of looking inside files other than plain text.
rga-fzf – Context-Based Fuzzy Search
I kept my favourite search tool until the very end. fzf is an open-source program that enables you to do a fuzzy search. It is a potent and versatile tool that works on the general Unix principles of stdin and stdout.
Fuzzy search refers to locating items that may not precisely match your search criteria. However, the results are organized in order of increasing similarity to the match criteria.
Installation
fzf can be installed from the official repository using the package manager:
sudo [apt/yum] install fzf
Usage
fzf can be used by simply typingfzfand pressing Enter.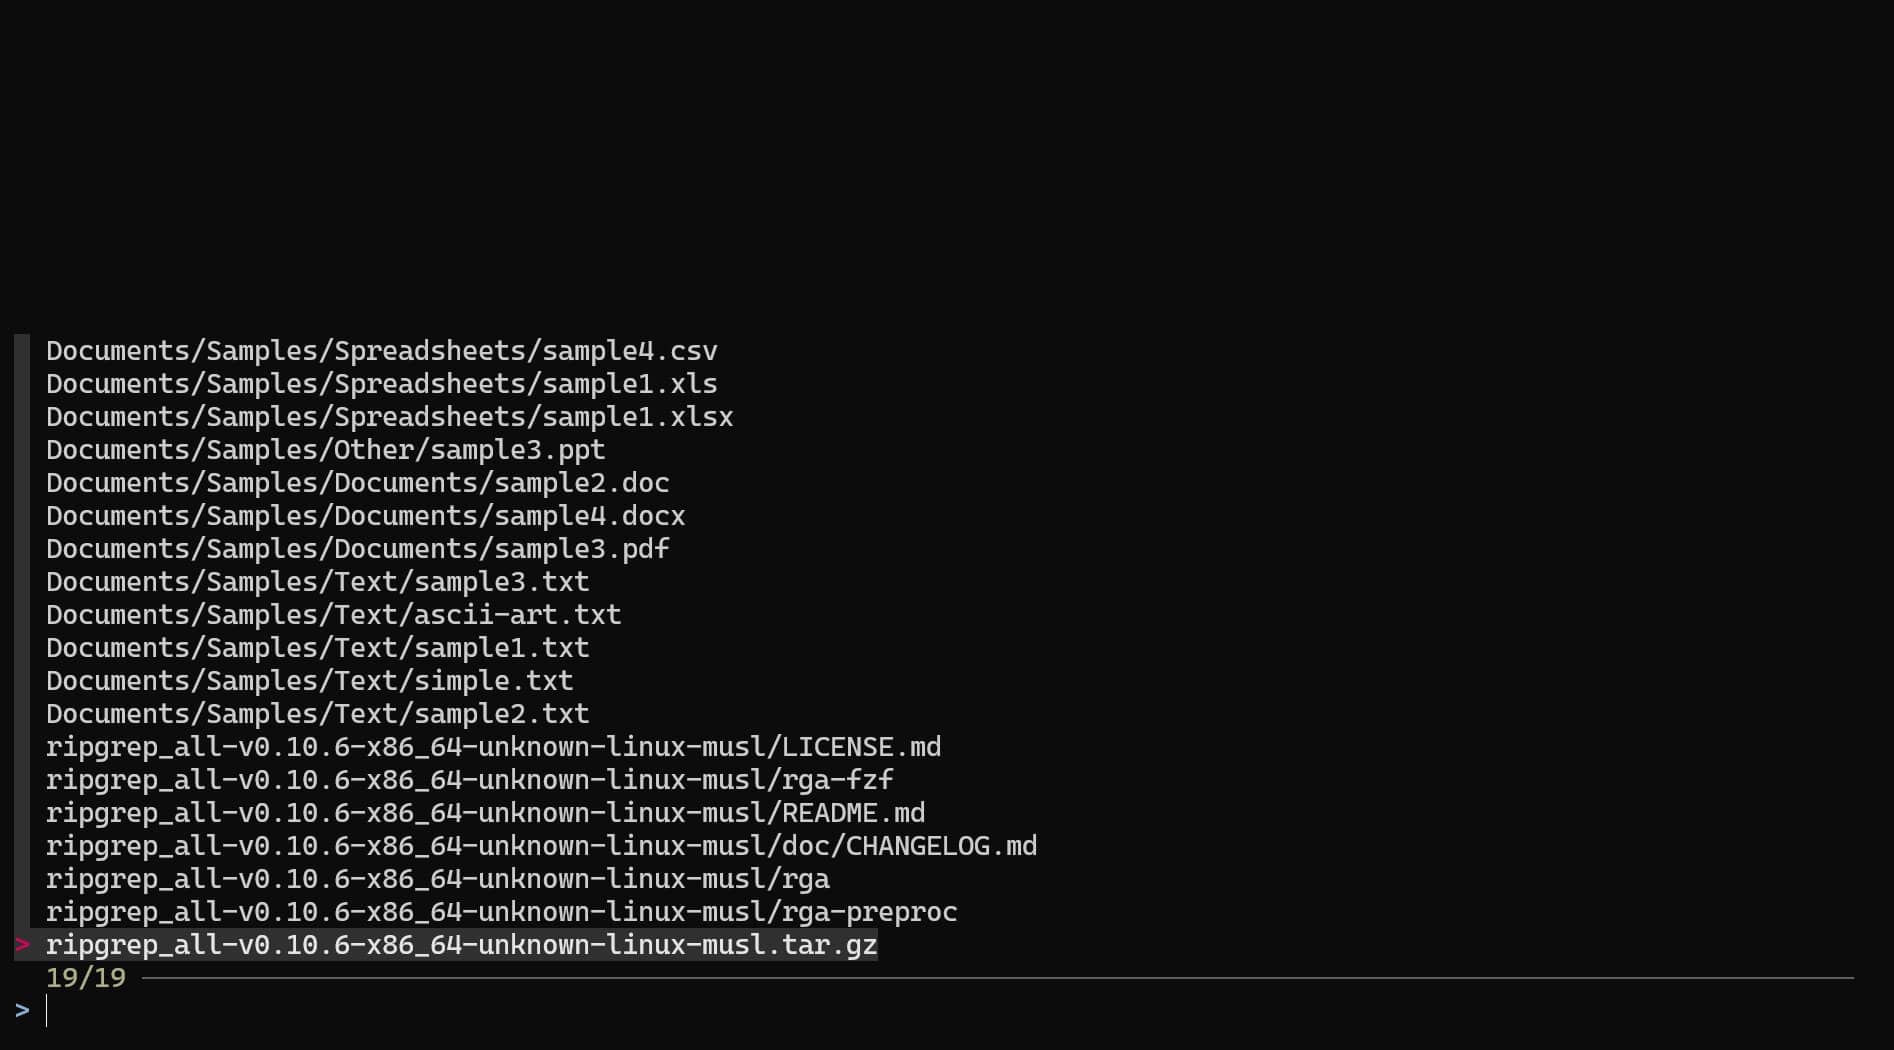
This will initiate a recursive fuzzy search starting from your present working directory. Now, you can start typing your search pattern to shortlist all files matching the criteria.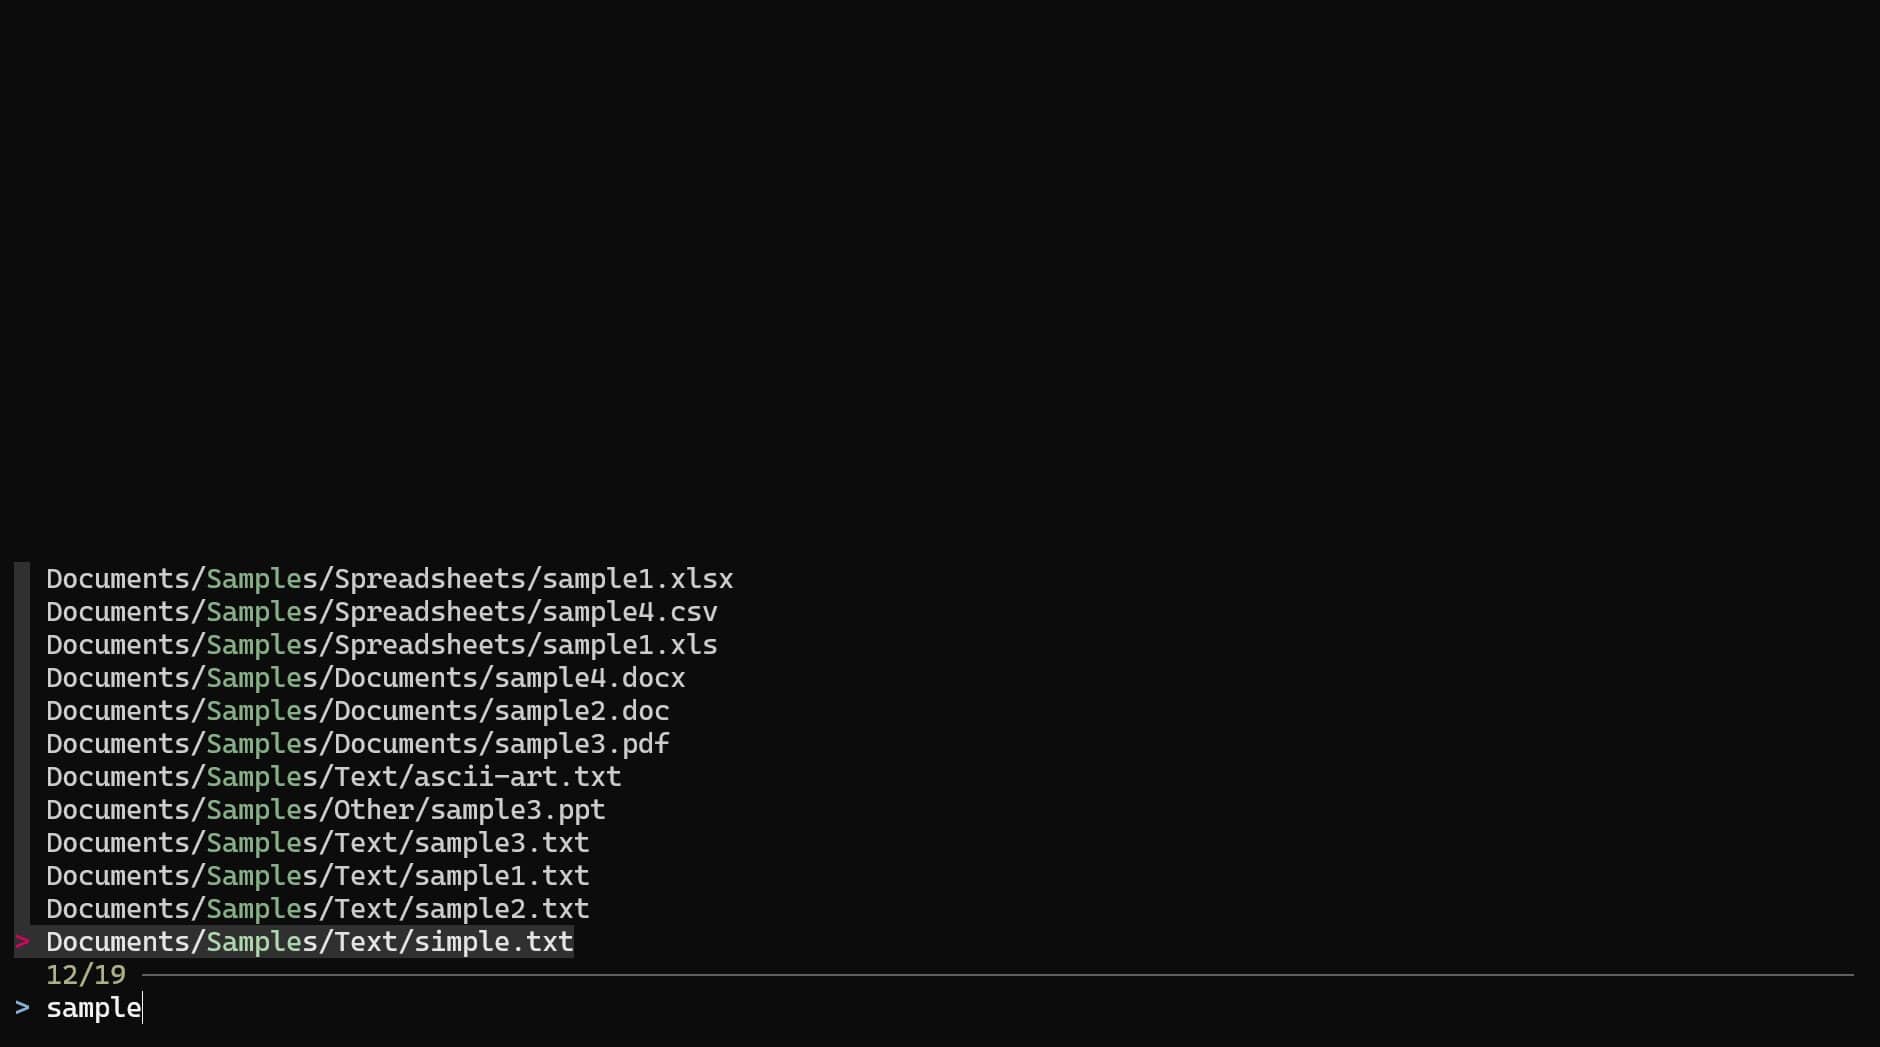
The key advantage of fuzzy search over regular search (using wild cards) is that you don’t need to match spellings, etc. You can keep typing multiple words, and it will show you the best to worst match results.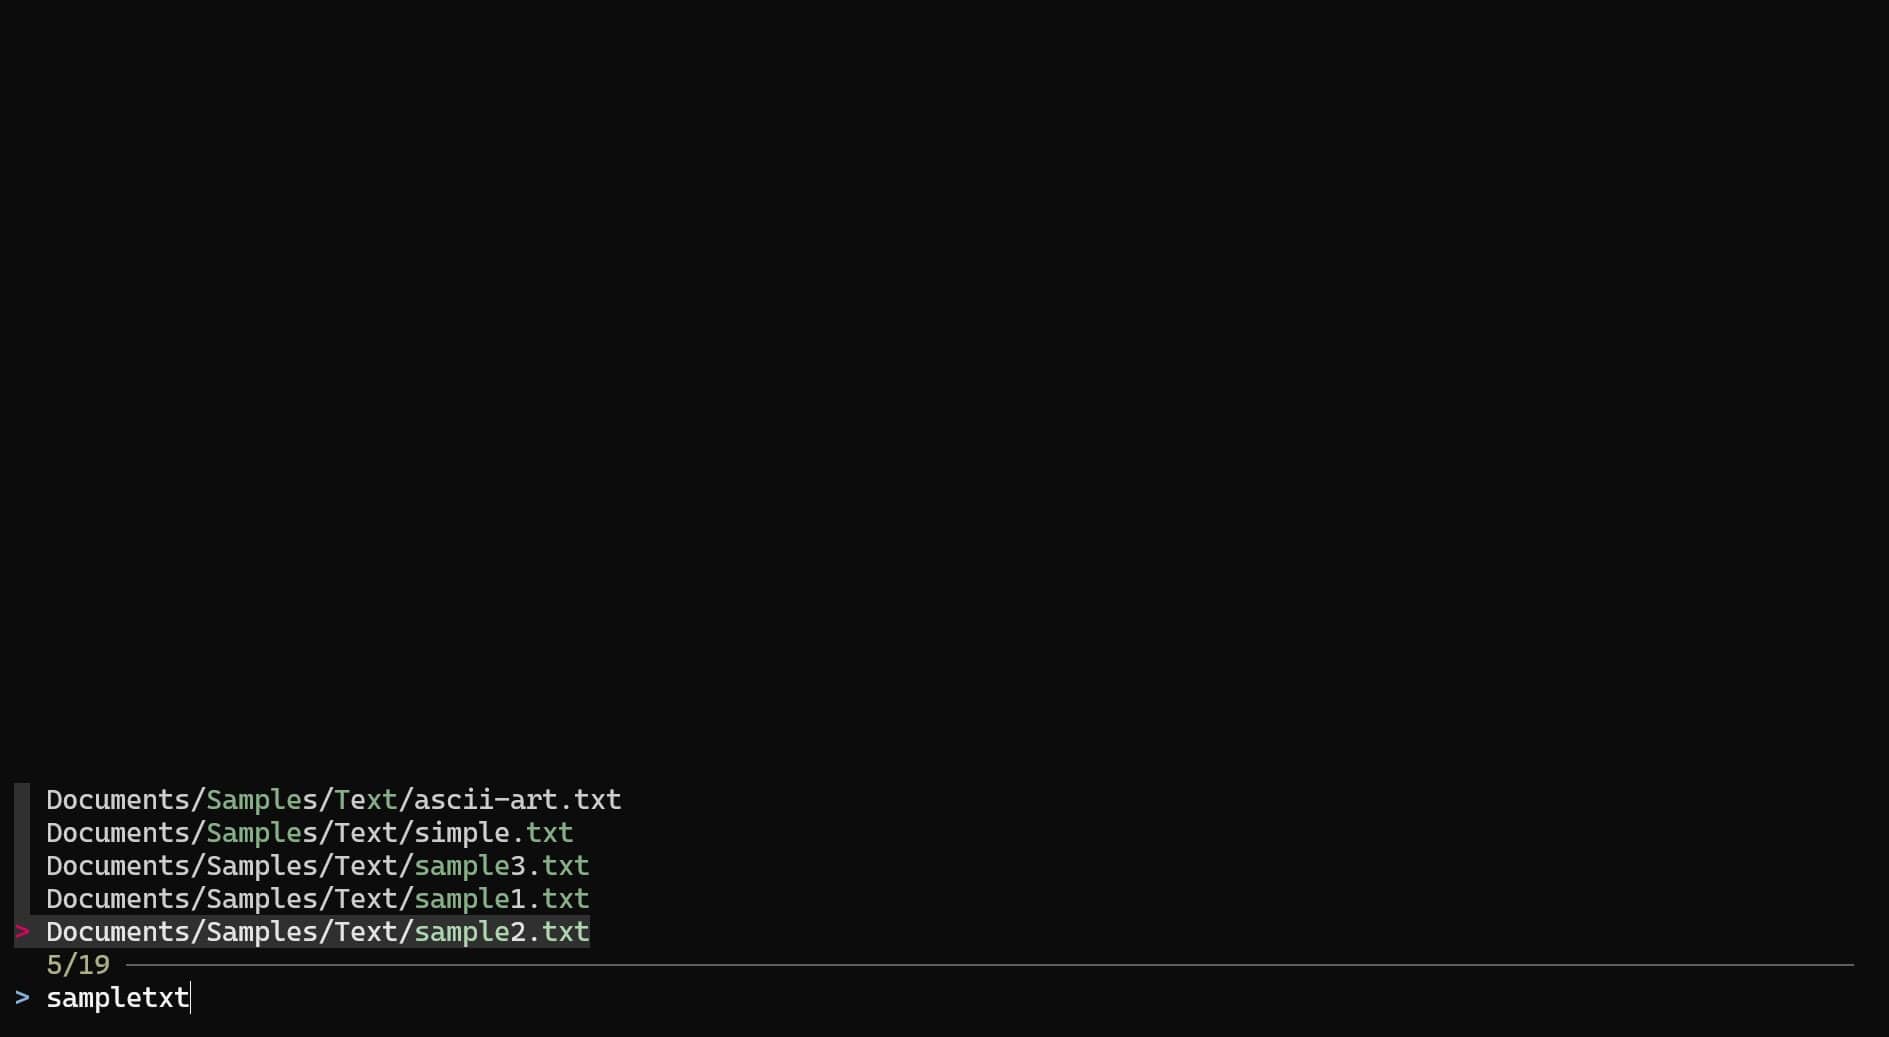
However, this tool particularly shines when combined with other valuable tools. For example, you can combine fzf with ripgrep-all and use the command.
rga-fzf
This allows you to run a contextual search that will make a fuzzy search of your search criteria within the content of all file formats supported by ripgrep-all. It also shows the sample output of the file’s content.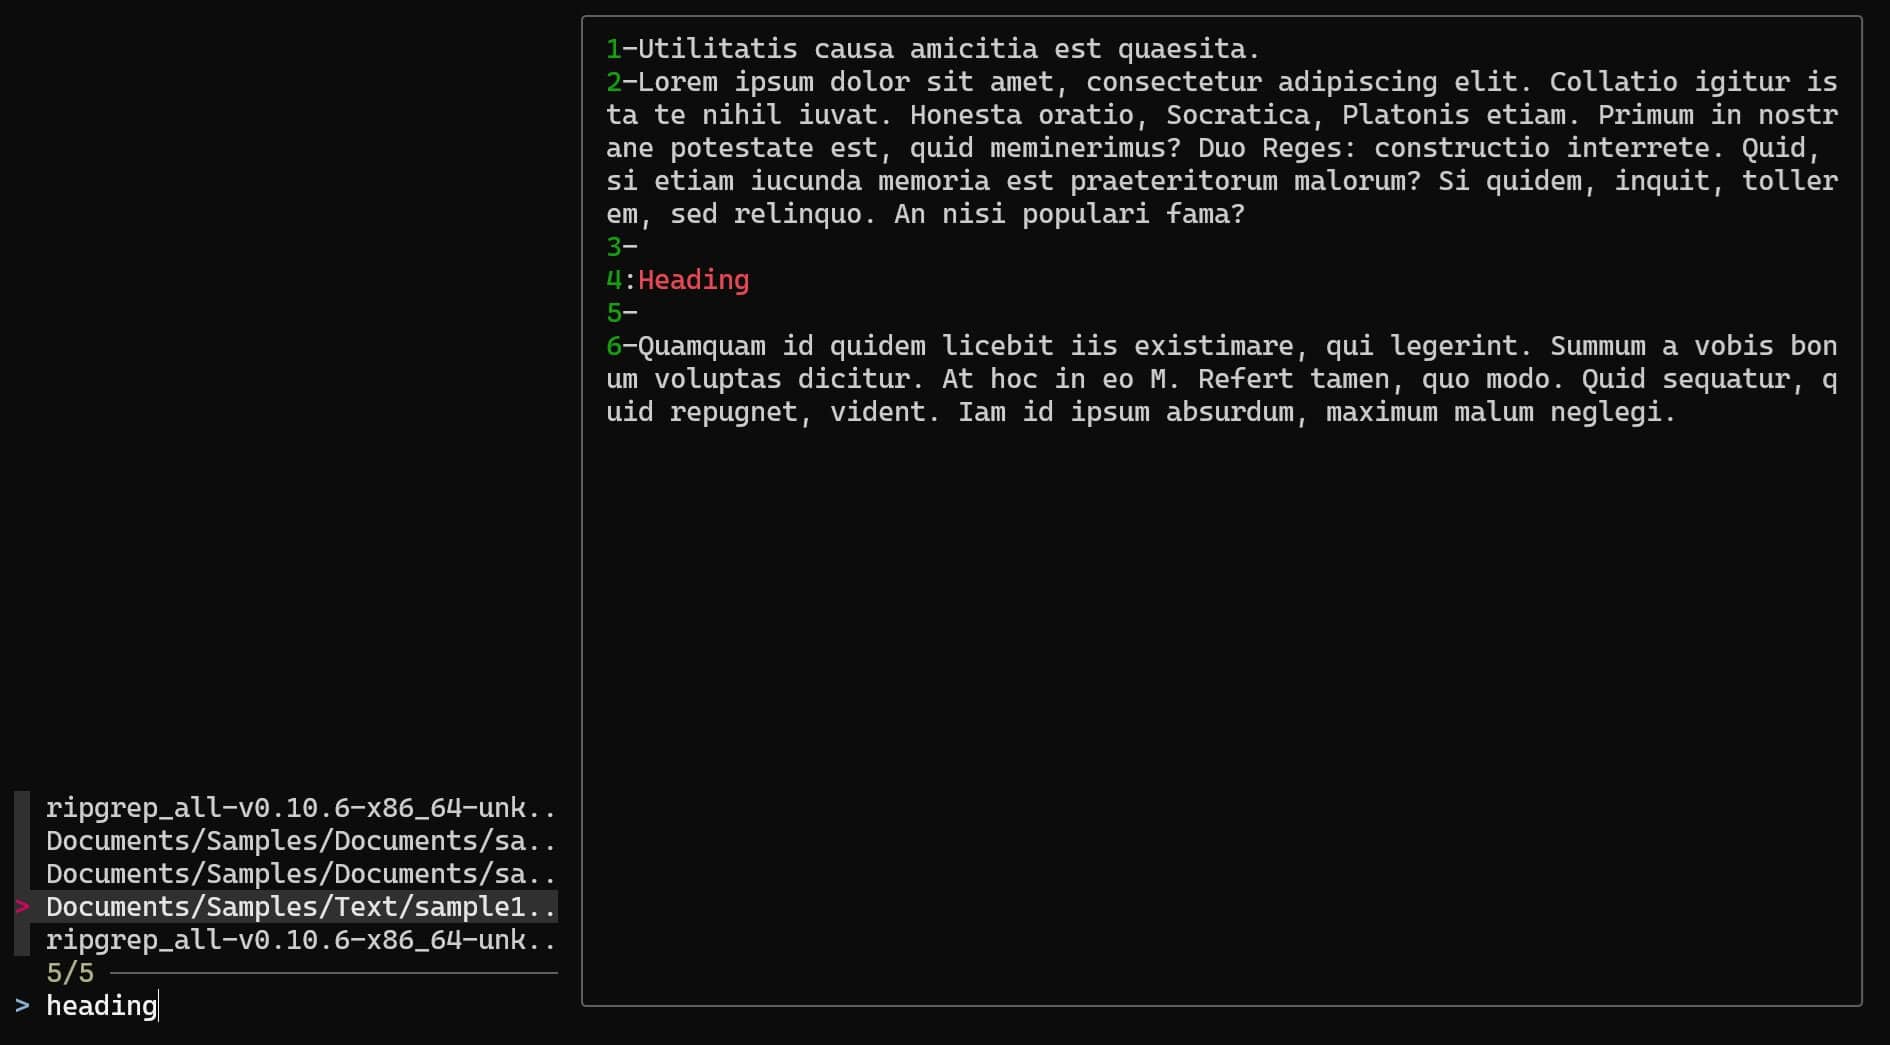
As you can see, fzf is a powerful and flexible tool. Since it is based on the Unix philosophy of stdin and stdout, it features several interesting integrations with other command-line tools. You can read all about this tool on their official GitHub page.